
Hey everyone!
If you’re reading this, chances are you’re interested in setting up your own home recording studio on a budget. Well, you’ve come to the right place! In this article, I’ll take you through each step of the process, from choosing the right gear to setting up your studio space. Let’s get started!
Table of contents
Step 1 – Choosing the right room for home recording studio in India
Location (room) is key when setting up a home recording studio in India. You want to choose a spot that’s quiet and has good acoustics. If you’re not sure where to start, try recording in different parts of your house and see which one gives you the best results.
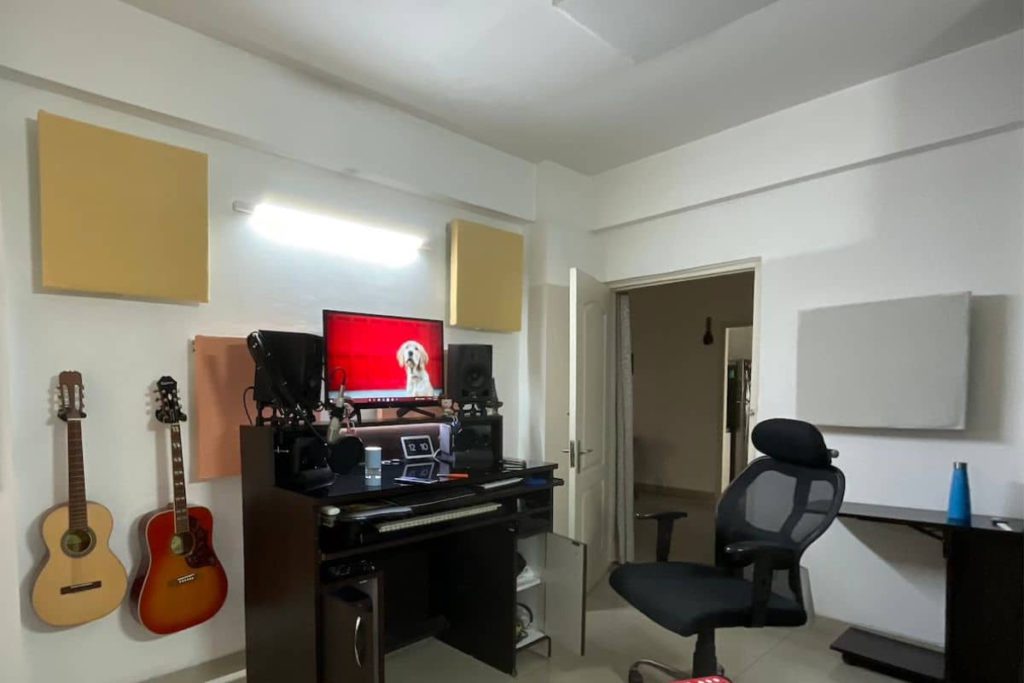
Ideally, it is better to have a dedicated room for your studio setup. But most of us don’t get that luxury. Do we? In the worst case, I suggest to set up the studio in the bedroom. It’s quiet, and you can have control over the light and sound levels. Plus, it’s close to where you sleep so I can easily hop into bed if you need a break from recording. Come on, look at the positives.
Here is an article on how to choose a good room for home studio recording
Well, I was lucky enough to get a quarter when I was serving in Jamshedpur. I was a bachelor that time, so had converted one of the two bedrooms into the home studio. Now that I have a slightly bigger house, I still have a dedicated room for the setup. I can create music without much disturbance or noise. That helps to concentrate and be more creative and productive.
Step 2 – Setting a budget and making compromises
Making a budget is the most important step in setting up a home recording studio. It helps you determine how much you are willing to spend on the studio. Which equipment you can afford and which are clearly out of range.
Frankly, there is no end to how much one can spend on a home recording studio. Wish-lists can be endless. Each new piece of technology will demand more and more money. So it is better to commit to a budget in the very beginning and then work backwards. Aim to prioritize the list of equipment keeping the limitations of your budget in mind.
In my experience, it is better to spend less and make compromises and conscious decisions initially. With experience you will get a better understanding of your needs and you can then spend on the higher quality or technology your setup or music desires.
Spend less initially. Make music with less gear and then buy once you have more experience.
– Gaurav Kapoor (speaking from experience)
For instance, if you have a desktop or laptop already. And maybe it is about 3 – 4 years old. In such a case, I suggest not spending on a new computer unless you have extra money. Rather, you can consider upgrading the existing computer. If it is currently running on HDD (hard disk drive), then a SSD (solid state drive) upgrade will give you far better value. If it is already running on SSD, consider upgrading the RAM instead. If you (or the computer) really wants that upgrade that is. But why not spend some time to test it out before upgrading. That’s what I would suggest.
I always recommend to spend every rupee wisely. Buy only when you are absolutely sure that you need it.
Step 3 – Planning the acoustic treatment of your home studio
First of all, acoustic treatment is different from sound proofing. Sound proofing is done to prevent sound from coming in or out of the studio. It is much more difficult to achieve. And hence requires a very high budget. That’s because sound proofing require On the other hand, acoustic treatment controls the internal sound absorption and reflection within the room. It is relatively easier than sound proofing. However, in small home studios, acoustic treatment has its limitations.
Strictly avoid acoustic foam panels – they are useless and waste of money
Gaurav Kapoor – again, speaking from experience
When it comes to building acoustic treatment for your home studio, there are a few things you’ll need to think about. Bass traps and acoustic panels make sense. Soundproofing materials such as rockwool, and heavy curtains are ideal. Bass traps can be placed in the corners of the room to help trap those low frequencies that can muddle up music recordings. Finally, acoustic panels are great for targeting the mid-range and low frequencies that are often the most problematic in a small space.
So if you’re serious about setting up a professional home recording studio in India, make sure to invest some time and money into getting these aspects right—your mixes will thank you!
Step 4 – Essential Equipments for Recording Studio Setup in India
Back in 2011, when I was making my first home studio, I started by making a list of the essential equipment I would need. This is the list I had made –
- A computer
- A microphone
- Audio interface
- Headphones
- Studio monitors
- Recording software (DAW), and
- Accessories like cables, microphone stand, pop filter, and shock mount.
1. Computer
The first thing you’ll need is a computer. It doesn’t have to be a top-of-the-line model. But it should at least have a good processor and enough memory to handle your DAW software. In 2011, my office laptop was not powerful enough to run any DAW. Besides, the company IT policy forbade personal software use.
So, I researched the best prices and in the end settled for a PC based on 2nd Generation Intel i5 processor. In 2023, you would call that PC a dinosaur. But even if it was under powered, it served me well for more than 7 years. Now I have a much more powerful PC running on AMD Ryzen7. However, I prefer my macBook Air over everything else.
The point is – start with something that your budget allows – even if it is small and less powerful. Upgrade only when necessary or when you start making money from music.
Gyan by Gaurav Kapoor
2. Microphones
3. Audio interface
You’ll also need an audio interface. This is the piece of hardware that connects your computer to your microphones and other studio equipment.
4. Studio monitors
Another essential piece of equipment is a good pair of studio monitors. These speakers will give you an accurate representation of how your recordings will sound when played back on other systems.
You’ll also need a microphone or two, as well as some headphones for monitoring. And don’t forget cables! You’ll need plenty of cables to connect everything together.
After I had a good idea of what I needed, I did some research on the best products available within my budget. I also looked for deals and discounts on equipment and software.
Step 5 – Research and invest in good audio engineering equipment
Now we come to the fun part – investing in the right audio engineering equipment. This is the key to creating a good studio setup. It can be intimidating at first, but you can use this guide to help you through it.
When it comes to microphones, you’ll want to go for one that has excellent frequency response and low noise – both of which are essential for capturing high-quality recordings. I recommend looking for models from brands like Rode, Shure, and Sennheiser, which are all available in India.
You’ll also need audio interface and monitoring systems. If you’re on a budget and still want quality sound, look for an interface with at least two inputs and outputs that supports 24-bit/96kHz resolution or higher. You should also get monitors or headphones with a flat frequency response so they can accurately portray what you’re recording.
When choosing equipment, look out for helpful online reviews and buy within your budget. That way, you can get quality audio engineering equipment without breaking the bank!
Step 6 – Tips and Tricks to Using Your Brand New Home Recording Studio
Now that you’ve set up your home recording studio, here are some tips and tricks you should keep in mind when using it. First, make sure you’re always recording at the highest quality possible. This means that you should use a good quality mic (I recommend buying one from a reliable source) and high-fidelity audio interfaces.
Second, find the right balance between acoustic treatment and acoustic isolation. Acoustic treatment is important for eliminating sound reflections and echoing in your room, but you also need to focus on isolating sound from one space to another. For this, I recommend using various types of soundproof material such as acoustic foam or egg crates to reduce the bleed from one space to another.
Third, practice proper vocal health by taking regular vocal breaks while recording or mixing music. Singers should also drink lots of water throughout their session in order to prevent vocal fatigue.
Following these simple tips will help you get the most out of your home recording studio setup and make sure your recordings come out sounding great!
Step 7 – Keep upgrading as per your needs
Once your home recording studio is up and running, it’s important to stay up to date with the latest equipment and advancements. Technology moves quickly, so what was good last year may not be so good today. That’s why I always recommend that my clients keep upgrading as their needs change.
For example, if you’re recording a full band or playing live shows, then you’ll need more mics and audio interfaces. If you’re doing electronic music production then you might want to invest in better MIDI controllers and synthesizers. And if you want to get into video editing then investing in a good computer with lots of RAM is essential.
At the same time, however, it’s important to remember that not all upgrades are necessary or even worth it at all times. Do your research and ask around for advice on what products are best for your situation and budget. That way, you can keep improving your studio as your skills and needs evolve over time.
Conclusion
Recording studios can be expensive to set up, but with a bit of research and some careful planning, it is possible to set up a high-quality studio on a budget. Here is a step-by-step guide to setting up a home recording studio in India.
The first step is to research the different types of home recording studios and decide which type is best for you. The second step is to gather the essential equipment that you will need for your studio. The third step is to set up your studio and start recording. The fourth step is to practice and perfect your skills. The fifth step is to market your studio and start recording sessions with clients. And finally, the sixth step is to maintain and upgrade your studio as needed.

I want to setup recording studio at home guide me 9916490945
Hello Partho Da. I tried your number multiple times to no avail. However, please write your query I will help you.
I want to set up home studio, mobile 9818399119
Mai apne room me studio setup karna chahta hu kitna budget tak hoga
7367068068
Shahrukh Sir, Thanks for writing. Apke paas computer already hai? Aap kaun se instruments ya vocal recording karna chahte hein?
Hello Amit ji. Thank you for writing. Please tell us your query and will help you. Pls avoid giving out your mobile number – as it is a public platform. Thanks a lot.
Please guide on setting up my home studio for my singing passion